for larger image
Pictures & Patterns © 2001-2030 Patti Pierce Stone, All Rights Reserved
terms of use...
These patterns pattern for charity or personal use only -- neither it, nor items made from it, are to be sold.
Nor should they be as a teaching material unless the teacher’s time is donated!
You may provide a direct link to a pattern, but may not copy the contents to your web site or any other form of communication.
Photocopies may be made and shared as long as the copyright notice and terms of use are visible.
If you choose to make items from these patterns for yourself or family, please also consider making a item for charity!
Not sure where to donate them ... click here for some ideas www.p2designs.com/CharityList.html
adobe acrobat reader 5.0 or newer required to open this document
Neck Coolers
needed:
- 1 yd cotton fabric (at LEAST 42" wide) -- this will make 8 coolers
please prewash the fabric to remove any sizing - 1/2 - 1 tsp polymer granules per cooler (see resource at end)
- sewing machine or serger
helpful:
- rotary cutter and mat (makes for quick cutting)
here are some objects that have been reported as useful when filling the pockets with crystals:
- a 2 ft length of 1" PVC Pipe
- a long-neck funnel (check your local auto supply store)
- roll a sheet of paper into long tube
- Cut or tear strips 4 1/2" wide by the fabric width (selvedge to selvedge). I usually use 45" wide fab, so I just cut them the width of the fabric -- 45" should be the max
NOTE: If your fabric is too wide (or not wide enough), purchase 1 1/4 yards and cut in the direction of the selvedge (from top to bottom) instead.
- Fold in half, right sides together, on the long edge
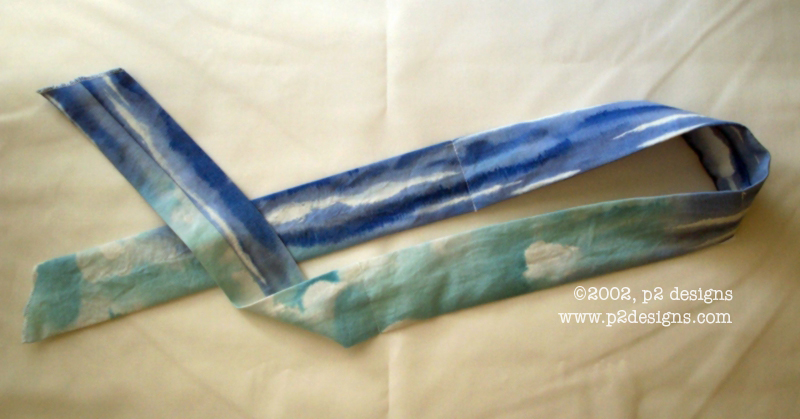
- Sew/serge the long seam using a 1/2" seam allowance (anything between 3/8" and 5/8" works here), and turn. Iron. As shown above, the seam has been placed in the center back, rather than at the edge. Now you have a tube about 2" wide and 40 - 45" long
- Mark the center of the long edge and stitch across it. Drop in a scant 1/8 tsp of crystals on each side of the seam (I used Watersorb, make a test tie with the brand you're using to be sure this isn't too much/too little after it's soaked).
Mark 4 1/2" from the center seam and seam again.
- Now you have 2 pockets with crystals.
- Drop in another scant 1/8 tsp of in both sides and seam like before (4 1/2 inches from the first set of seams). You should have a total of 4 pockets.
NOTE: Some people make 2 pockets that are 9"/10" each, and some make just one 18" pocket. For longer pockets, adjust the quantity of granules accordingly.
- Serge ends (or fold in raw edges and sew across) to finish ... I personally prefer the ends diagonal. THE SHIPS PROJECT: please tuck in and sew, do not just serge to finish ends.
Check the Watersorb site to order the crystals in bulk. I personally like this brand the best, it requires some 50% less than the brand I bought in the garden department. If ordering from Watersorb, order the "medium" granules.
NEW USE: The Ships Project has received word directly from a contact at Watersorb® that cool ties made with Watersorb® brand crystals can also be heated in a microwave (once they have been soaked, of course). They will purportedly retain heat about 3x times longer than they will retain cold.
Please attach a care label:
- immerse in cold water approx 60 min, until crystals become gel
- tie around head or neck
- regenerate by soaking 1-3 minutes
- do not freeze
- dehydrate to store
- hand wash only, mild soap
- ties can be heated (briefly) in a microwave.
take care when removing as they will be extremely hot!
©2001-2030 p2 designs, all rights reserved
no part of this website, including but not limited to graphics, photos, or text
is to be used for any reason without the written permission of the owner